8x10, why must you be so square? Your frames and mattes are so readily available, and yet you are virtually useless when it comes time to make a wide landscape print. Your cousin, 8x12, is much more reasonable, and yet nowhere to be found at Michaels or A.C. Moore. If only Aaron Brothers hadn't moved out of Maryland, there might be some hope.
In case you haven't already guessed, I've been in the process of making a lot of prints lately. This seems to happen every year as the weather cools and more time is spent on my butt indoors. It's time to put down the camera and make use of all those photos taken during summer travels. Nostalgic, isn't it?
As for the 8x10 dilemma, perhaps I should just start shooting everything with a Mamiya 7 like Ben Roberts. Then again, he also shoots with an Xpan. :-)
By the way, here's a shot from last March during a special overnight trip to Rocky Gap State Park here in Maryland. It's called Sidling Hill. It's worth a brief stop if you find yourself driving along the I-68 corridor.
This is also one of the photos I had to painfully crop down to 8x10. While it does still work, I think the drama of the striations is significantly diminished. Luckily the trees are still there to provide some struggle.
Tuesday, November 17, 2009
Monday, November 16, 2009
Reproportion
Photojournalists, cover your ears (or eyes, in this case). This does not apply to you.
One of the interesting properties of landscapes is that they can usually be stretched horizontally without anyone noticing. Hills become more gentle, rocks become flatter, but there's nothing particularly odd about that, so most people never question it. Why do we care? Because this can be very useful for creating a panoramic image from a relatively square one.
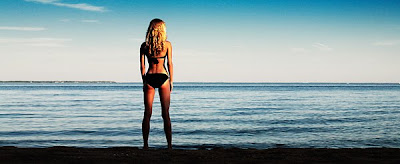
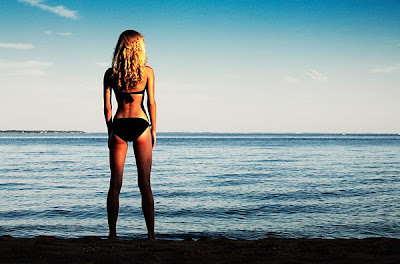
Not only can the image be stretched, but it can be selectively stretched. Here's an example with a single image of Chelsea:
The top image is the original, full frame of the photo. Chelsea clearly wouldn't appreciate it if I'd simply widened the whole image (and her figure along with it). Instead I widened only the areas to the left and right of her by doing the following:
What I find amazing about this is that widened areas of the image blend right into the unaffected areas. It's a neat trick that can be selectively applied around people, trees, or any figure of known proportion. Give it a try!
One of the interesting properties of landscapes is that they can usually be stretched horizontally without anyone noticing. Hills become more gentle, rocks become flatter, but there's nothing particularly odd about that, so most people never question it. Why do we care? Because this can be very useful for creating a panoramic image from a relatively square one.
Not only can the image be stretched, but it can be selectively stretched. Here's an example with a single image of Chelsea:
The top image is the original, full frame of the photo. Chelsea clearly wouldn't appreciate it if I'd simply widened the whole image (and her figure along with it). Instead I widened only the areas to the left and right of her by doing the following:
- Resize the canvas (not the image) to the desired width.
- Select the landscape to the left of her with the Marquee tool.
- Edit -> Transform -> Scale...
- Stretch the selected area to the left until it fills the left side of the canvas and press Enter.
- Now do the same for the landscape to the right of her.
What I find amazing about this is that widened areas of the image blend right into the unaffected areas. It's a neat trick that can be selectively applied around people, trees, or any figure of known proportion. Give it a try!
Subscribe to:
Posts (Atom)