Saturday, August 27, 2016
Check Twitter
Life has picked up pace a bit lately, so I've been making more use of the original microblogging service, Twitter, rather than writing full blog posts. In spite of its downtrodden stock price, Twitter seems to be indispensable in society these days. Check out my feed @thephotoway for the latest photos, tips, and other randomness. Thanks!

Sunday, May 10, 2015
The Shot: San Luis Valley
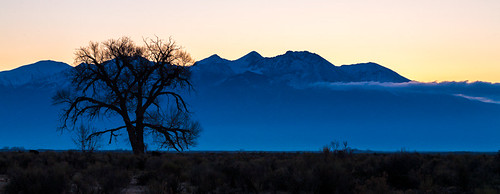
Canon 5D, 70-200/2.8, 100mm, 1/15, f/11, ISO 100, tripod, Lightroom 4
It takes over 30 minutes to get from Alamosa to Great Sand Dunes, which gives one time to think and observe. I came across this location along the way. There's a KFC sign right next to it, which is probably what most people notice, but it also makes a good landmark. Regardless, the specific location is 37° 28.427'N, 105° 46.970'W. There's a nice, wide shoulder, but make sure to pull off as much as you can since the cars are zipping along at a good clip on this unwavering portion of US-160.
This is obviously a sunrise shot, with the Sun coming up to the right of Blanca Peak. I'd hoped to capture more clouds, or to get a more active sky above the peaks, but that's all the more reason to return and try again. This shot could probably also work at sunset with Blanca Peak fully illuminated, though you'd have to ensure that the tree is darkened such that it would silhouette against the background.
Sunrise shots can be challenging in San Luis Valley with the mountains and extreme weather to the east. Don't even bother with sunrise at Great Sand Dunes, which buttes right up against the Sangre de Cristo Mountains. Luckily there are plenty of other rewarding locations in the area. Nearby Alamosa National Wildlife Refuge even has some water that can make for a good foreground on a still morning. There's plenty of time to explore in the middle of the day when the light is bad.
Get out there.
Sunday, May 3, 2015
The Shot: Great Sand Dunes National Park
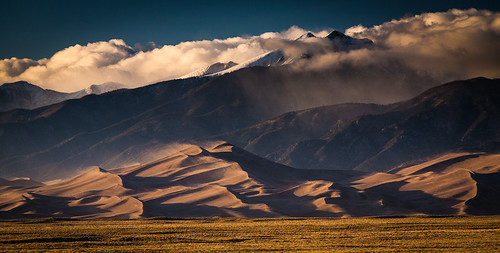
Canon 5D, 70-200/2.8, 200mm, 1/125, f/8, ISO 200, polarizer, tripod, Lightroom 4
This was somewhat inspired by QT Luong's post. In other words, the best shots of the dunes are not on the dunes. In fact the location is quite accessible. I always get annoyed with obscure directions to photo locations though when GPS is so ubiquitous. Timing is everything, so there's no time to reposition.
In this case, proceed to 37° 41.240'N, 105° 33.213'W along CO-150 about an hour before sunset. Any later, and the shadows of the dunes may be too long.
Use a polarizer. This is very important for getting the right light reflecting off the sand dunes at this angle. You'll see the immense difference as you rotate the polarizer into position.
For this shot, I was using a 70-200/2.8, but I was shooting at f/8, so you don't need the 2.8ness; a cheaper, more travel-friendly f/4 or 5.6 should be fine. I was shooting zoomed all the way in to 200mm. I tried a 400mm lens, but that didn't allow me to get the mountains in the background. You could probably get away with a 300mm, but that wouldn't get you as much width in the frame. Obviously, I cropped some of the top and bottom of this photo a bit in post.
As you can see by the sand coming off the tops of the dunes, the wind was whippin'. It was pretty relentless too. I recommend using a very solid tripod. Normally people go for lighter tripods, but you'll be right along the road for this shot, so a heavy, solid tripod should actually work in your favor. If you can, use your vehicle as a wind block too. Even with a good tripod, I still had a few shots come out blurry due to camera shake; the lens hood is great at catching those gusts of wind.
The San Luis Valley is an amazing place, even without the dunes. I highly recommend a visit. Happy shooting!
Thursday, December 25, 2014
Merry Christmas
Just a quick merry Christmas to everyone. 2014 has been quite a year, to say the least. 2015 should be full of possibilities.
Sunday, November 2, 2014
Gore Creek Trail
The plan was simple: hike four miles in, another four miles in, then eight miles back out, preferably downhill most of the way. The trick was finding the right trail. After pouring over maps for several hours in June, my friend Peter and I finally decided on the Gore Creek Trail near Vail.
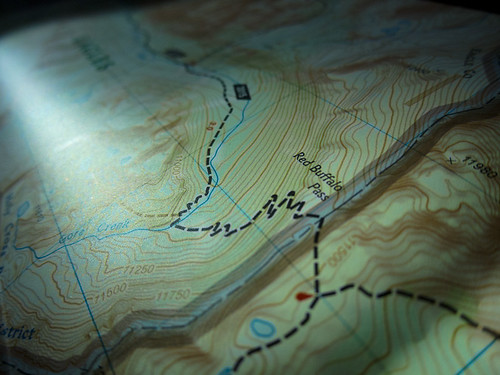
After carbing up at Chipotle in Silverthorne, we drove over Vail Pass then hit the trailhead (39° 37.660'N, 106° 16.485'W) just off I-70. The trail was steep and hot; not a good start. As we moved east up the creek valley, our cell phones lost signal, and some cooler clouds rolled in. The situation was improving.
We reached camp 1 (39° 37.492'N, 106° 12.314'W) as the afternoon ended. Eager to beat the darkness and any additional weather, we threw up the bear lines and set up the tent in one of the flatter areas we could find off the trail, back in the trees. Since the trail was part of the Eagles Nest Wilderness, the rules were clear, but there were no official spaces for anything. In other words, do your best. We considered taking the steep side trail up to Gore Lake, but time and weather were against us. Instead, we examined the small Swedish grave site and explored our options for fording Gore Creek the next day. We waved to some passing day hikers, not realizing that they would be the last people we'd see for a while. We were on our own.
Our dinner consisted of 9-year-old Mountain House Chicken Teriyaki, which was best described as "edible." It was time to pack it in.
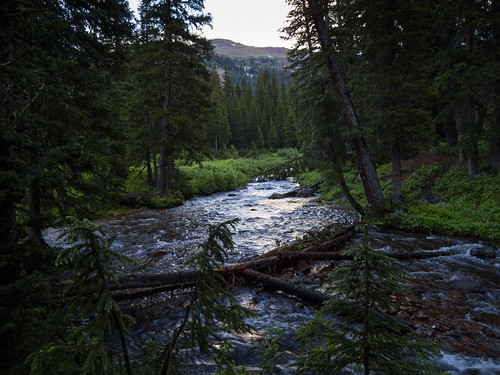
The next morning was sunny enough to dry out the tent next to the grave site. After some breakfast and instant coffee, it was time to cross the creek. While the water was only knee-deep, it was also flowing at a fairly good pace. I only had one trekking pole to stabilize with. The rough, slippery creek bed was murder on my bare feet. Peter had his camera up and ready to get the action shot of me falling in. Thankfully that never happened.
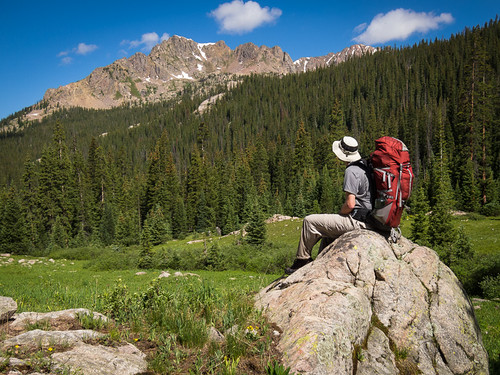
Once across and reassembled, we were rewarded with one wildflower meadow after another as our hike continued further up the valley. The open spaces and surrounding mountains made us want to stop and keep going at the same time. It just got better and better.
After another, much easier creek crossing, we made it to camp 2 (39° 37.025'N, 106° 10.985'W) around lunch time. We'd made it to the western base of Red Buffalo Pass, an open meadow surrounded by 12,500 foot peaks.
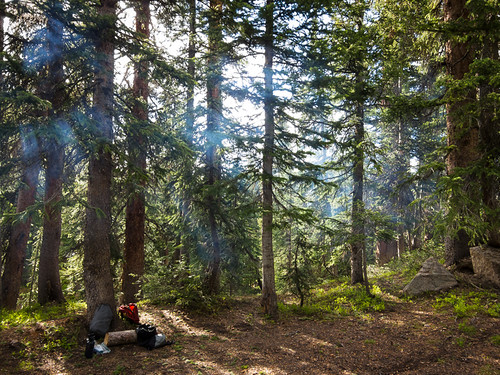
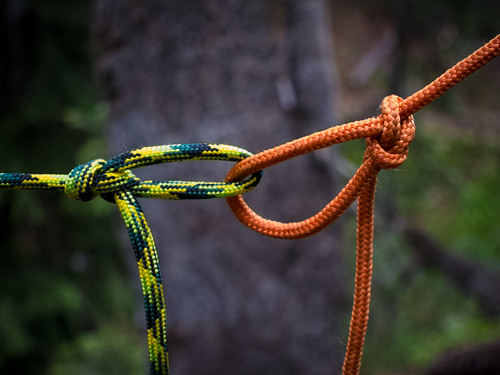
We set up camp, threw together our day packs, and headed east for the pass. At this point we were already at 11,000 feet at the start of the trail, and my lungs were reminding me of this every step higher. As we worked our way up, the view to the west revealed the entire Gore Creek valley we'd just traversed. Stop. Catch breath. Eat protein gummies. Drink water. Take pictures. Repeat.
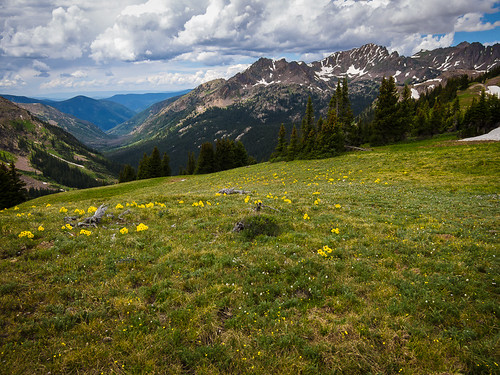
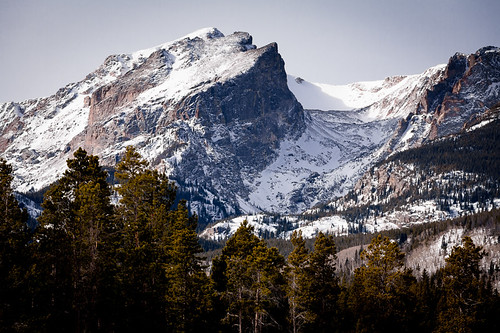
Perseverance, and Peter's patience for me, eventually got us to the top of the pass. We were in the land of marmots and glaciers, well above the treeline. The views were nothing short of spectacular, with glacial lakes, Eccles Pass, Buffalo Mountain, and Silverthorne to the east, Red Peak to the north, and Gore Creek Valley to the west. We could have stayed all day, but a thunderstorm snuck up on us. Trail running has never been my thing, but lightning has a way of motivating.
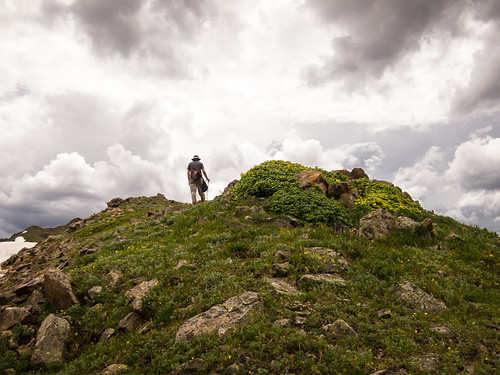
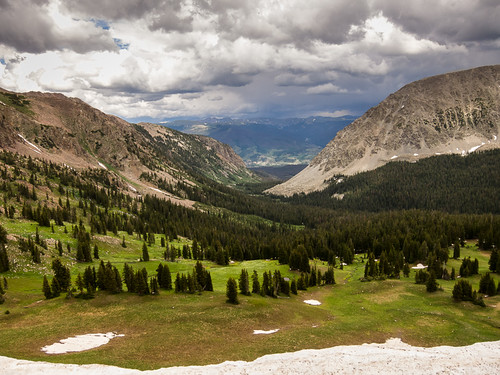
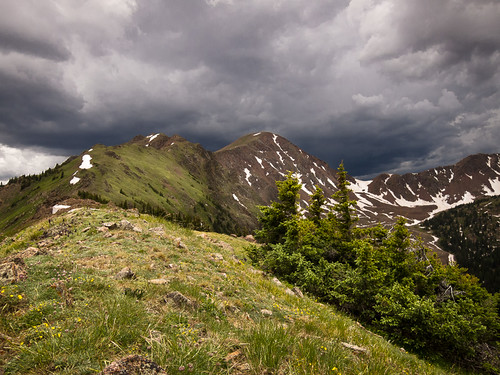
Being back at the bottom of the pass wasn't a bad place to be. As evening set in, beams of sunlight shot under the clouds, through the creek valley, hitting the peaks and meadows around us with the kind of light painters dream of.
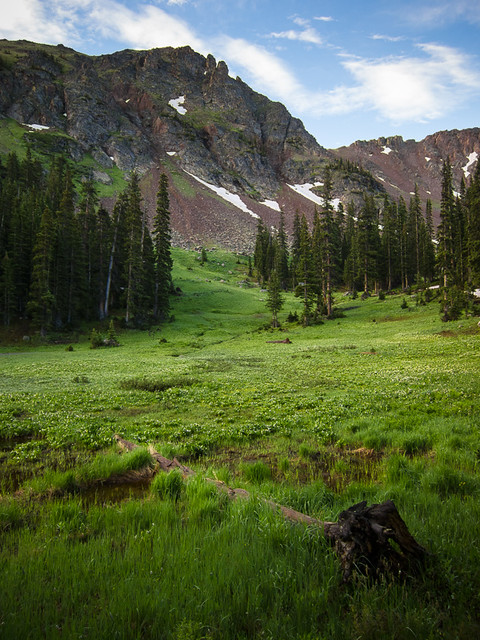
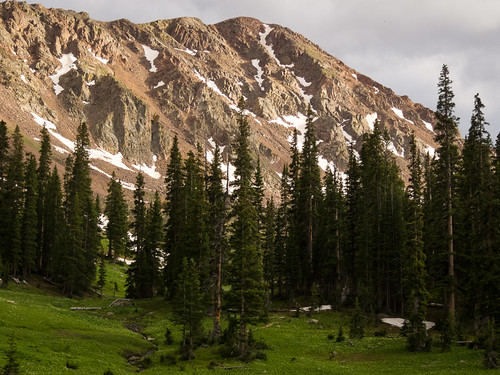
The night was uneventful, and surprisingly warm for 11,000 feet. That morning we took a few more pictures, then packed up early for the trek down to the trailhead.
It had been about 36 hours since we'd encountered another human being. Half way back to camp 1, we came across a group headed for Red Buffalo Pass with some very large packs, and a couple of light-and-fast hikers doing the whole trail through in one day; I can see the appeal of the latter. As our altitude dropped, the temperature started to climb, and the moist ground that was covered in wildflowers gave way to dry scrub brush. A couple open rock faces along the way gave us a chance to dry out the tent in the Sun and enjoy a bit more scenery.
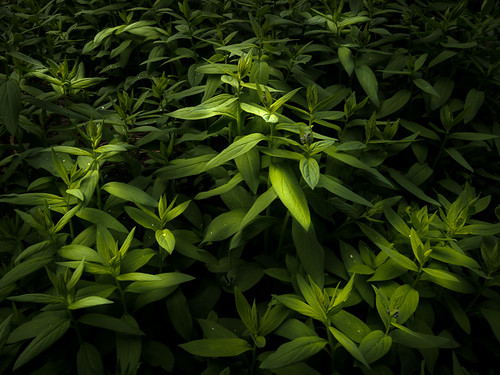
It had been an amazing hike. I can see why the really great photos are taken a bit off the beaten path. At our most remote point, we were over four miles from the nearest road. We did have a little bit of cell service at the very top of Red Buffalo Pass, but we were completely out of contact during our entire time in the Gore Creek valley, which is the way it should be.
Whether you're a foot, a mile, or 20 miles out there, the point is that you're out there. These photos were all taken with the tiny Canon S95, but that doesn't really matter. Happy shooting.
Saturday, October 25, 2014
Return to Steamer Lane
As I mentioned in my bag post, one of my goals during the trip to northern California was to get in some good surfing photography time. Was it worth lugging the 1D Mark II (and its enormous charger) and the 400/5.6 for just one morning of shooting at Steamer Lane? You bet! Even though this camera is 10 years old, there is still plenty of solid, raw data coming off that pro-grade sensor to run circles around many newer cameras. Surfline reported a 10-12 foot swell coming in that Sunday morning, and it did not disappoint. Here's the take, in true TopFivePhotos style...
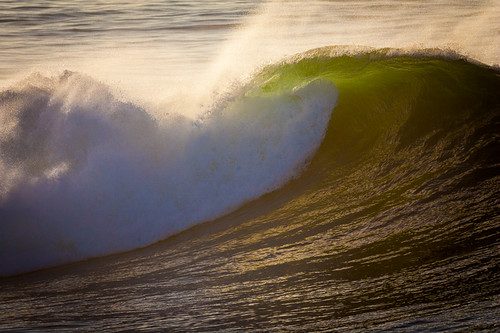
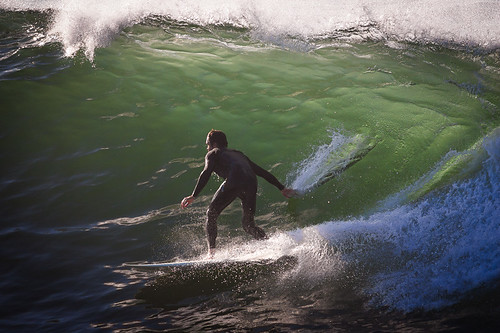
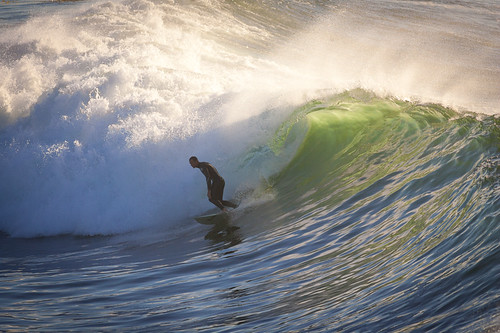
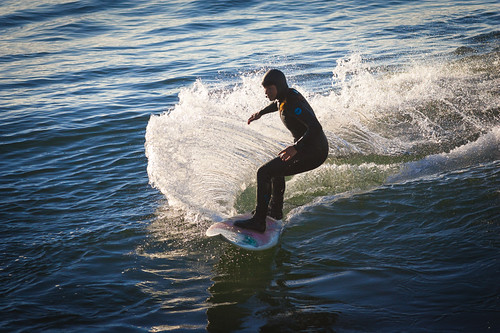
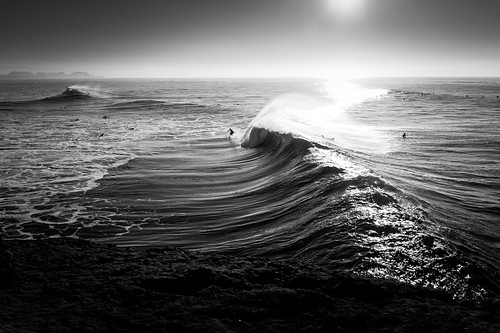
I know I used that last shot in my previous post, but it's probably the single best shot I got out of the Fuji during my time with it. Happy shooting.
Tuesday, October 21, 2014
What The Fuji
By which I mean, I've really been wanting to know, for a while now, what it's like to use one of the new Fujifilm cameras. I'd considered renting the X-E2 and the 23/1.4, but in the end renting an X100S seemed like it would capture the fundamental Fuji experience at about half the rental cost.
The tl;dr version is that the Fuji's sensor doesn't quite live up to the spectacular optics that Fuji is known for. I still love the optics in my Hasselblad Xpan (built by Fuji many years ago).
I really enjoyed the aperture and shutter controls, but there were other little things besides the sensor that simply didn't make sense to me. For instance, if I've got the camera in EVF mode, why does the EVF retract every time I turn the camera off? Just leave it in place. If the on/off switch is convenient enough (eg. Nikon and Fuji), then I'm one of those people that turns the camera off and on between bursts of shooting to save the battery. That's a lot of actuations for the EVF. The Xpan has a similar mechanism for the lens magnification when you put on the 90/4 lens. And you know what, that's the one part of the camera that's totally broken. I foresee a similar fate for the EVF on the X100S. It makes me think that an X-E2 might make more sense since it only has an EVF with no extend/retract mechanism to break.
Don't get me wrong, there were some things I liked about the camera. The fact that I could see what my shot would look like in B&W through the EVF as I was shooting was a revelation that would never have occurred to me if I hadn't rented the camera and tried it for myself. It wasn't an exact translation to what I would later see on screen, but it was pretty good.
Another thing that didn't make sense to me was that the Q menu showed up in the viewfinder when I had the rear display turned off. Why would I want to hold the camera up to my eye to change settings like that? Those people that hold up their iPads to take pictures look pretty dumb, and I felt just as dumb holding the camera up to my eye to change settings. Just put the menu on the rear screen, Fuji.
Some of my gripes with the camera might have been addressed if I'd had the camera for a longer period. For instance, knowing what I know now, I would have made more use of the higher ISO's. Most of the time I was trying to keep it in the 200 to 400 range, with an "f/8 and be there" aperture priority setting. However, ISO 800 and 1600 would have produced very usable results, and "f/4 and be there" would have been fine with the smaller sensor.
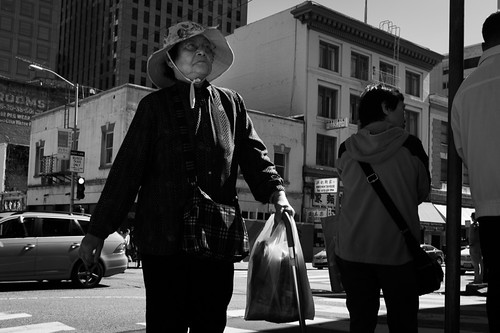
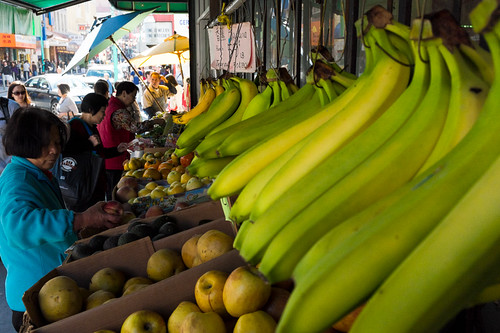
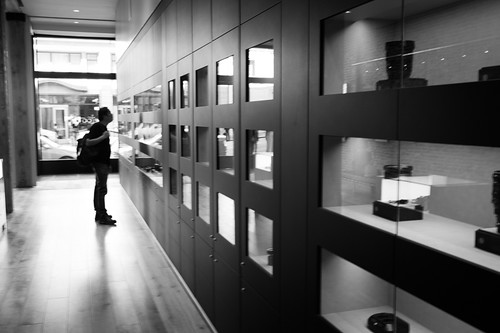
Even with the vintage shutter/aperture control aesthetic, I still found the camera to be more complicated than it should have been. Still, I'm very glad I gave it a try, and I can see why some people really love their Fujis; if you can only have one camera, it's not a bad choice at all. I think I'll stick with the Leica and Xpan for film and maybe give the Ricoh GR a try for street photography, where you really need digital for all those silent, throw-away shots. I did manage to capture a couple street shots in Chinatown, San Francisco with the X100S though.
Happy shooting with whatever camera you have in your hand.
Saturday, October 18, 2014
Bagging the Bay Area
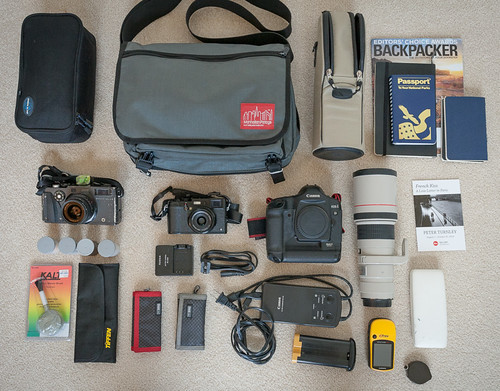
Another year, another trip, another bag shot (last year, +JCH). This time, the destination was the Bay Area of northern California. The bag is the same, but the contents are almost completely different.
Fujifilm X100S, from LensRentals and the main camera of the trip. I'd been drooling over the Fuji cameras for a while, but I'd never actually used one. This trip seemed like the perfect opportunity. I plan to put my impressions of the X100S in another post.
Hasselblad Xpan, because I can't seem to leave it behind on big trips, and I had an unfinished roll of Velvia inside.
Canon 1D Mark II, the old sports workhorse. Surfing is one of my favorite sports to shoot, and northern California is a bit of a mecca for surfers, so this was a no-brainer in spite of the size of the kit. I'm pretty sure the 1D charger alone is larger than the whole Fuji kit.
Canon 400/5.6 L USM, my current go-to, long-reach sports lens. It's about as good as a lightweight 400mm lens can be. I used to have the Canon 400/2.8 L USM, which was a stunning lens, but it was a beast to travel with, and was hard to justify owning once I stopped shooting sports regularly.
Manhattan Portage Europa Medium Messenger Bag, because it's light weight, well made, looks sharp, and can swallow a ton of stuff when expanded. Even I was amazed when I got the 400 in there with the 1D, 1D charger, and Xpan.
Sea to Summit Soft Cell, otherwise known as the Xpan Go Bag. These days it's more organized thanks to the Tiffen filter case to the bottom.
Canon 400/5.6 lens case, because the Manhattan Portage bag doesn't have any padding. I hate overly-padded bags that add bulk and weight.
Two rolls of Kodak Portra 400, a nice, general purpose film for traveling, with good color rendition.
One roll of Kodak Tri-X 400, which needs no explanation.
One roll of Ilford FP4 Plus 125, which I've been meaning to try for a while now.
Think Tank Pee Wee Pixel Pocket Rocket (red), for the the X100S SD cards. I had to scrounge for enough SD cards for the trip since most of my storage is compact flash for the ol' 5D and 1D.
Think Tank Pixel Pocket Rocket (gray), for the 1D CF cards. I brought way more than I needed, but this was one of the few opportunities I would get to shoot surfing (we don't get much surfing here in Denver), so I certainly didn't want to run out. I also brought some smaller, obsolete CF cards that I could just give to people if they needed a photographer in a pinch.
Kalt Blower Brush, for the battle against dust.
Garmin eTrex Venture HC, so I'd know where I'd been. It's also fun to add new trails and locations to OpenStreetMap whenever possible.
Extra pair of glasses (in the white case), so I'm not completely helpless if something happens to my main glasses. Really they're just the glasses from my previous prescription; better than nothing.
National Park Passport, because it's fun to get stamps for the parks my wife and I have visited.
Moleskine notepads, for writing stuff down, though I find myself using my iPhone for notes more and more.
Peter Turnley card, from the San Francisco Leica Store, which had his French Kiss series on display. If you ever get a chance to see his work in person, I highly recommend it. The SF Leica Store itself is a very nice space with plenty of new and old gear to drool over. The staff were very friendly and didn't bat an eye when I took out the Fuji for a couple shots. It definitely made me wish I had my M6 or CL with me though.
I didn't carry all this gear around all the time. The San Francisco Bay Area is hilly (understatement) and I certainly didn't want to bring the 1D and 400. There were times when I wanted the Xpan, but even that was too heavy for a full day on foot. Most of the time I just had the X100S, a bottle of water, and a pull-over fleece in the bag. In the end, one decent camera is all you really need.
Wednesday, June 4, 2014
Ptarmigan Trail
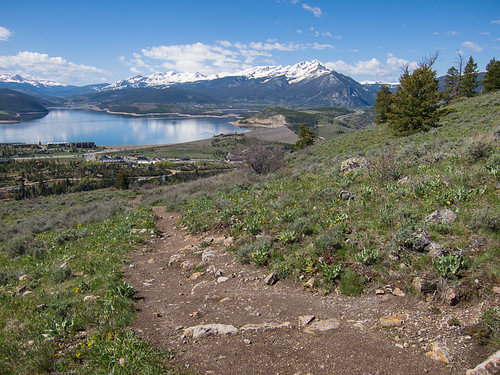
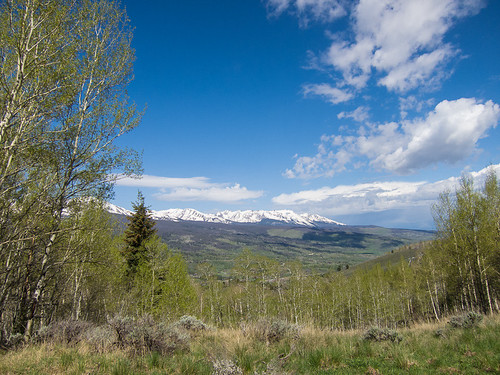
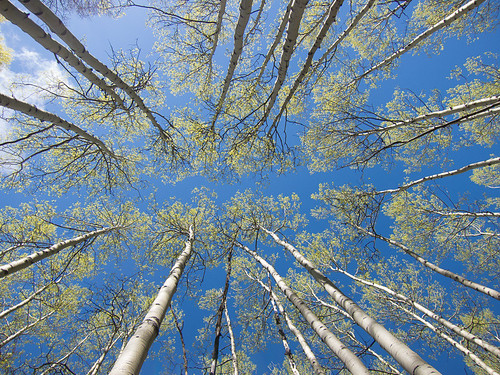
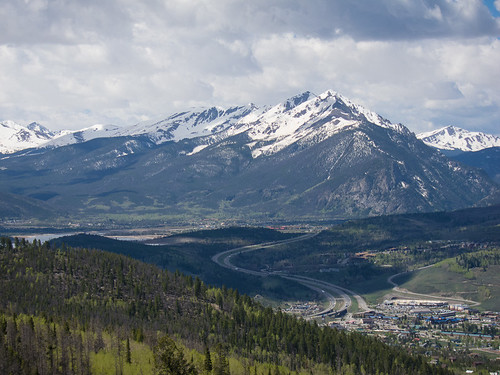
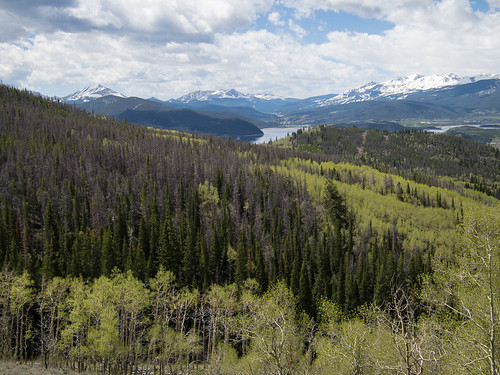
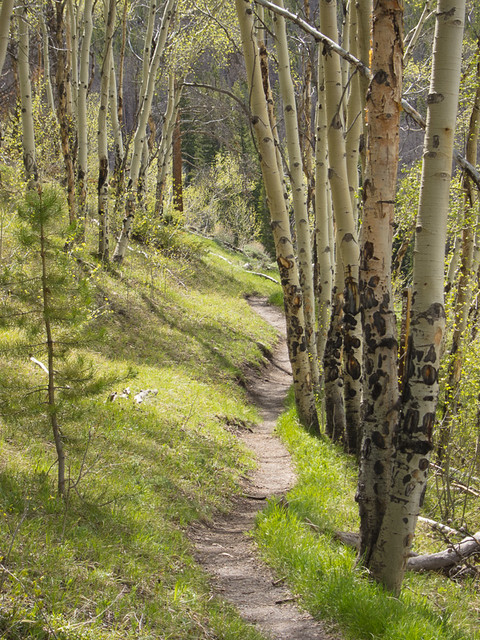
This is one of the most photogenic hikes I've been on recently. The trailhead is at 39° 38.108'N, 106° 3.210'W (directions here). After the first small section of trail, you'll encounter a road with a big white arrow pointing to the left. Follow the arrow and proceed 350 feet up the road where you'll re-encounter the trail. From here on, following the trail is pretty straight forward. It's steep initially, but will level out about 0.7 miles in. You'll be rewarded with some of the most amazing views of the Gore Range and Dillon Reservoir, as well as wildflowers and groves of pine and aspen.
Wednesday, December 25, 2013
Merry Christmas

Just a quick post to wish everyone a Merry Christmas. I hope you are all looking forward to 2014. It doesn't matter if you're shooting with new gear in new places, or cherished gear in favorite places, as long as you're getting out there and making a few wrong turns.
Merry Christmas!
Friday, November 15, 2013
The Right Wrong Way
Want to get some interesting photos in Venice? Take one of the vaporetto boats the wrong way around the island at sunrise.

I'd intended to take the boat on the most direct route to St. Mark's Square, through the Grand Canal (the "2" line), then explore the alleys before the crowds started showing up. However, the boats were still running few and far between since it was so early. I saw the "1" line was also going to St. Mark's Square, and thought, "How much longer could it be?"
It turned out to be much longer, much windier, and much colder, but much more interesting at the same time. I got a prime seat in front of the pilot's cabin, because no one else wanted to go this way. Their loss. I got to see the working side of Venice, and got a close up view of Giudecca since the boat made a couple stops there. I must have blown through half a roll on the Xpan, when I captured the picture above. All the working boats and cruises were on the move too. The poorly shot video below shows the overall atmosphere. It was amazing.
Seriously, it was cold, especially as we rounded the west side of the island and entered the open water of Laguna Veneta. I'm not a fan of the cold, but I loved every minute of it.
Sometimes getting lost or making a wrong turn is the best thing you can do when traveling.
Venice Flat Recommendation
Ok, you've seen the Paris edition, now it's time for Venice. Again, I found a great place on AirBnB, but it took a bit more searching this time.

Initially, I'd booked a place closer to the heart of Venice, in Castello, which had a liberal cancellation policy. The reason I'd booked it was that it was so cheap. I was beginning to see why. A few days before we departed for Europe, I took another look at the place and got a different vibe. It looked like it was just some dude with some roommates and a spare room; not the kind of place I'd want to stay with my wife.
Thankfully by this point, the other costs of the trip had been spent, and I was a little more comfortable increasing the budget for Venice. I cancelled the original reservation and got all my money back, minus the AirBnB booking fee, which wasn't too bad. I applied for a better place, but the owner didn't respond within 24 hours, so the application expired. On to another place.
As they say, the third time's the charm. I found this place right near the Venice train station (Santa Lucia not Mestre). This made it incredibly easy to get settled on arrival. We met the host's assistant right across the canal from the train station at San Simeone Piccolo. The assistant was right on time meeting us, and even gave us some local restaurant recommendations while she was showing us the apartment. It's also worth noting that since the apartment was near the train station, it gave us easy access to all the vaporetto boats (mass transit waterbus) that go to every part of the city.
And wouldn't you know it, Google just added Venice to Street View (though "street" doesn't really apply here). You can actually see the apartment with the silver window shade up top.
I have to admit that it felt a little strange staying in a place attached to a church. Once I started thinking about it, I realized that there are few places in Italian cities that aren't attached to a church. Other than that, the place was clean, quiet, and had a shower that worked much better than the one in Rome. As you can see from Street View, the surrounding canals and alleys are charming, though I'd recommend packing your bags and seeing it for yourself. Happy travels!
Sunday, November 10, 2013
Eleven
The last roll of film that I shot in Venice seemed like it would never end. Now that I have the results back from the lab, I can see why. Here's the first frame:

I seriously think the film counter got all the way up to 39 before the roll was done. Was this a mistake? Yes. Is this photo still interesting? You bet.
Instead of thinking of this as a mistake though, I prefer to think of it as turning film up to 11.
Sunday, November 3, 2013
Paris Flat Recommendation
One of my neighbors was asking about some of the details of our recent trip to Europe so he could plan something similar. Rather than just letting him in on the details, I figured I'd write a few blog posts about it.

Back in college, my buddy and I stayed at Woodstock Hostel. It was fun, and had all the good things you'd expect from a hosteling experience (more on that trip here). However, now that I'm married and all grown up, something better was in order. Thankfully I was able to find this apartment with a great host on AirBnB, just a stone's throw away from Notre Dame Cathedral and Les Halles Station.
The location could not have been better. I could pop out in the morning for a photo-walk around Ile de la Cite and Ile Saint-Louis to watch the Seine and the rest of the city wake up. In the afternoons and evenings, I could head over to Place Georges Pompidou or Esplanade de la Liberation for some pictures and people-watching. C'est tres magnifique.
Really the only down side was that there were a lot of steps to get up to the apartment. However, being on the top floor also afforded a charming view of the rooftops of Paris (picture above). It also allowed for more light and less noise. The place was totally silent at night, in spite of all the restaurants and shops below. Speaking of which, there was a convenient Carrefour (care-A-foo) grocery store right across the street. One of the restaurants we enjoyed in the area was Pain Vin Fromages, which was a cozy fondue place with a friendly staff, and more varieties of cheese than I'll ever remember.

One recommendation I'd make before departing for any apartments in Europe: write down the coordinates and bring a GPS. Paris is notoriously difficult to navigate, especially if you've just arrived on an airplane and popped out of a subway station. If you have a Garmin GPS like I do, make sure you write down the coordinates in decimal-minute format. There are several websites that will do the conversion for you. Alternatively, you can do what I do and put Google Earth in decimal-minute format, mouse over the point of interest, and write down the coordinates at the bottom. Also note that it may take your GPS a few minutes to lock onto the satellites since you've presumably traveled a great distance. Sit down, relax, and enjoy an overpriced bottle of water while you wait. Oh yeah, don't forget extra batteries for the GPS.
More to come...
Sunday, October 27, 2013
Bagging Europe
Just got back from Europe last week. My wife and I flew into Paris, took trains to Heidelberg, Wurzburg, Rothenburg, Fussen, then flew out of Venice. Needless to say, it was quite a trip.

The photo above is the gear I took with me, which I took just before we left. I wish I had a before-and-after shot, but when you get back from three weeks on the go, you just kind of crash. I only got all my film mailed off to NCPS a couple days ago. That's for another blog post though. As I was putting the bag together, I kept my Notes from Rome post in mind. Here's the breakdown:
Hasselblad Xpan, because I just couldn't resist the urge to take it, even though it's really heavy.
Leica CL, because I wanted to take a Leica, and it's lighter than the M6.
Leica 90 f/2.8 Tele-Elmarit, for a little more reach, or in case someone needed a portrait taken (no one did).
Canon S95, for all the stoopid pictures in bad light, plus it can shoot video.
Polaris light meter, because camera light meters can't always be trusted.
Sea to Summit Soft Cell, otherwise known as the Xpan Go Bag. These days it's more organized thanks to the Tiffen filter case to the right.
Manhattan Portage Europa Medium Messenger Bag, because it's light weight, well made, looks sharp, and can swallow a ton of stuff when expanded. It even had room for a music box on the return trip.
Nine rolls of Kodak 400TX (Tri-X), which is my go to black and white film with lots of latitude.
Seven rolls of Kodak Portra 400, which I mainly planned to use in the Xpan. It turned out that Venice was very colorful though, so I did the unthinkable and put color film in the CL as well.
One roll of Fuji Pro 400H, which has been sitting around since before I switched to Portra.
One roll of Ilford FP4 125, in case I wanted to shoot some higher quality black and white.
Kalt Blower Brush, for the battle against dust. Thankfully there are no worries about dust on the sensor when you use film.
Garmin eTrex Venture HC, so I'd know where I'd been. It's also fun to post far-away places on Strava.
Extra pair of glasses (in the white case), so I'm not completely helpless if something happens to my main glasses. Really they're just the glasses from my previous prescription; better than nothing.
Toothbrush, because I'm paranoid like that.
Day to day on the trip I didn't lug all this gear around. Usually I'd carry either the CL or the Xpan, depending on what I was expecting to shoot. If I took both, then I just needed to remember to give my shoulder a rest now and then. The coffee shops of Europe make it very easy to take breaks.
I like the way the film and small-digital complimented each other on this trip. I could take all the touristy, I've-been-here shots with the S95, which let me conserve my film resources and be more considerate when I was in "real" photography mode. Having both also provided some insurance that all the shots from the trip would not be lost. In the end, I came back with about 10 rolls exposed, plus about 500 digital pictures from the point-and-shoot.
More to come when I get the film back...
Sunday, April 21, 2013
Prints available on Etsy

I'm happy to announce that four prints are now available via ThePhotoWay shop on Etsy. I hope you'll take the time to check it out, buy a print (or four), tell all your friends, and get them to tell all their friends. That's not asking for too much, is it? :-) Seriously though, any support for this site is much appreciated. Thanks!
Saturday, March 30, 2013
NBM House and Home

Yesterday I needed to clear my head a bit before meeting a friend of mine in Eastern Market, so I decided to swing by the National Building Museum. I didn't have any particular exhibits in mind, but I've never known the NBM to disappoint. By chance I came across the House & Home exhibit. At first glance it didn't seem like much; some displays of rooms and such. The detailed models of city and country residential structures were interesting. But the real magic was toward the end.
Imagine an issue of Dwell magazine that's 10 feet tall and consists of nothing more than full page images of beautiful, modern homes and apartments. Now instead of still images, imagine video, constantly alternating between each side of the magazine, showing people living in the homes, along with some Helvetica-like music. It really was enthralling.
On top of that, one the dwellings featured in the video was MICA's very own Gateway building. My picture above doesn't really do it justice.
If you're in the area of the National Building Museum or the Gateway building, I suggest you take 30 minutes and check them out. You won't be disappointed.
Wednesday, March 27, 2013
Fort McHenry Radio

This isn't really photography related, but I thought I'd post something about it since I can't seem to find it elsewhere on the Internet. One dark, early morning commuting through the Fort McHenry Tunnel, I noticed that certain radio stations would stay on the air even as I was passing through the tunnel. "Surely not,"1 I thought to myself; I was underground, under the water. There must be a repeater.
I pointed this out to a friend of mine, and he figured that since the stations coming through were from Baltimore, maybe they had enough power to make it into the tunnel. I had my doubts, but I didn't have any evidence to the contrary.
A few months ago I was driving through the tunnel yet again, but this time I'd left the radio in scan mode since none of my presets had anything good on. Sure enough, the tuner landed on 107.1 MHz about half way through the tunnel. A female voice simply repeated, "This is the Maryland Transportation Authority radio rebroadcast system for bore 3 of the Fort McHenry Tunnel. This is only a test."
So not only is there a repeater for the tunnel, there's actually one for each bore of the tunnel. I haven't done an exhaustive search for stations that they're repeating, but so far I've found 100.7 and 102.7. I'm sure there are more.
I also haven't checked to see if there's something similar for the Harbor Tunnel. My guess is that it's really there to provide emergency broadcasts to people that might be stuck in the tunnel during the regular bumper-to-bumper delays. Obviously it also provides entertainment, probably helps relieve some people's claustrophobia, and may give workers something to listen to while they're doing maintenance.
Ok, that was a lot of words for not a lot of content. The picture above was taken (haphazardly) with a Leica M6 on Kodak Tri-X. Normally I wouldn't post such a poor photo, but it seems to capture a bit of the grittiness of commuting in this area. It's also my only photo that's remotely relevant to this article.
Happy shooting and commuting!
1Insert Airplane quote here.
Sunday, March 24, 2013
From Industry to Charm
Really these pictures could have been taken in any industrial area. These pictures happen to be from Baltimore. I still believe in Baltimore. Between 1950 and 2012, the population dropped from about 1.1 million to around 600 thousand. But I think the city is well over that statistic. Today it's more about the art, the business, the waterfront, the history, and of course, the charm.
If all you know of Baltimore is what you've seen on The Wire, you know nothing. I dare you to walk up Charles Street from Federal Hill to Penn Station and not fall in love.
These pictures were not taken anywhere near Charles Street. At no point was I afraid that some thug would take away my Leica though. Just put that image out of your head.


Saturday, December 22, 2012
Forwards and Backwards
Forwards: The trusty, old 4GB Core2 Quad I built in 2008 finally took a turn for the worse. The main 160GB IDE drive was giving all kinds of random read and write errors, and the heat sink simply wouldn't say on the processor. Obviously, both of these problems could be easily fixed piecemeal, but it was time for something new. Four gigabytes of RAM just isn't enough to run Chrome, Lightroom 4, Photoshop CS5, and iTunes. Thankfully a new Microcenter opened up nearby just a couple months ago. A couple days and a few hundred dollars later, I'd built a quiet Core i5 with 16GB of RAM and 120GB SSD. Amazing. I guess I can't really be that amazed with something like an iPhone 4 in my pocket. Now that's amazing.
Backwards: I've had the Leica M6 for just over a year now. It hasn't had a working battery for almost that entire time, which means I've been eyeballing the exposures for a year now. The pictures below were uploaded to flickr without any levels, brightness, or contrast adjustments in Photoshop or Lightroom. They're essentially straight out of the camera. It's a good feeling.
Perhaps the moral of the story is that you don't really need a faster computer any more than you need a "better" camera if you take your time and get it right the first time.
To everyone (anyone?) reading this, I wish you happy holidays and the best of luck in the new year.


Subscribe to:
Posts (Atom)

